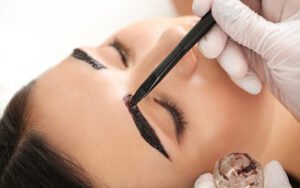
Owning an eyelash studio in Perth isn’t a joke! Having recurring customers and gaining a good reputation for the business needs a lot of effort. So if you own an eyelash studio in Perth and want to make your business become successful. One of the major issues to tackle is making your clients hold their eyelash extensions for a long time. Take a look at some of the best tips to achieve the same.
Prepare Your Workspace
While performing an eyelash extension the important factors that require consideration include humidity, temperature and air quality. As every eyelash extension glue requires its own degree of humidity and temperature to work in the best condition, it is essential for you to maintain the required humidity levels and temperature at your workspace. It can be achieved by using a humidifier and a thermometer. It also helps in controlling moisture levels.
Eyelash Preparation
A glue works best on a clean and grease-free surface as dirt can be a barrier in between the glue and the natural flange making the bond complicated. To get a clean surface it is essential for you to remove eyelashes makeup completely using a non-oily makeup remover. After removing the eyelash makeup, it is important to dry them up to remove any humidity that may have been left by the product.
Use the Best Eyelash Primer
After cleansing your eyelashes, it is important to apply primer to eyelash extensions. The eyelash extension primer contains a small concentration of alcohol which helps in dehydrating the natural eyelash which will further let the glue to extend into the natural eyelash much better. Also, it is essential to make the extensions filling by preparing the natural lashes by applying primer over them.
How Much Eyelash Glue Is Right?
Using eyelash glue in the right amount is an essential thing to consider. Using excessive eyelash glue for eyelash extensions is just as harmful as using too little. The right amount of glue for eyelash extensions is 2 to 3 mm at the base. For volume extensions, 1 mm deep glue must be applied and attaching the base well is also necessary. If you have excessive glue on the extension, put it on the ring and never on the patch as it may take too much glue off the extension.
Step By Step Eyelash Extension Application
Except for the hypoallergenic glues, most of the eyelash extension glues dry on contact within a fraction of seconds. Therefore, it is essential to look for the correct eyelash, separate it from the rest and then place the extension. Press lightly for a few seconds as it will ensure that your extensions are glued perfectly.
Picking the Perfect Angle
Every natural eyelash is different – while some are curved, others are straight and many others grow in the opposite directions. Therefore, it is important to pick the perfect angle for placing the lash extension. Always look for a slightly similar curvature to the natural eyelash as it makes the joint more durable. Another important thing to consider here is to place the base of the extension 1 mm from the birth of the natural eyelash, but make sure it does not touch the skin. It is essential that both bases are joined well so that they do not separate.
Applying the Eyelashes Perfectly
Now that you know about the right amount of glue required and the perfect angle, it is time to know how to apply these perfectly. Wet the eyelashes in the glue, remove any excess glue (if required) and place it at the angle you find perfect for the natural eyelash! Concentrate on making the connection between the base of the extension and the base of the natural lash perfect. Hold for 1 second and then leave it free.
The most essential part it letting your clients know that to allow the glue to dry completely, they should not apply water, makeup or cream in the eye area during the first 24 hours for avoiding the premature fall of the eyelash extensions.
Author Information:
This article is written by Auko Beauty, a reputable eyelash studio in Perth. To know more visit https://aukobeauty.com/


