Ceramic Tiling Tools is an online store that stocks the highest quality tiling tools and products of the Raimondi Brand. Since 2008, we have been selling the Raimondi brand products online. Our goal is to make the best tiling tool supplies accessible at the most affordable price. We are the best and reliable online source to shop for the highest standard tiling products. At Ceramic Tiling Tools, you can find an extensive range of products like wet tile saws, tile cutters, grouting tools, bridge saws, tile spacers, and more. Visit our website to shop the best tiling product of the Raimondi brand at the best price ever!
One of the most challenging activities during home remodeling projects is tile work. Most tilers work on the flooring or hard surface for up to eight hours each day. They need to work on their knees to install tiles, and spread large amounts of adhesives and grout. Lack of care could be the reason for wear and tear of the knee & knee injuries. Knee pads & protectors are among the most efficient strategies to stop this. Here are some of the benefits of knee pads! That’s why tilers need one of the best knee pads on their knees during prolonged working hours.
Why Knee Pads?
Protection – Although the patella shields your knee joint, it is brittle and susceptible to fractures. A decent knee pad can lessen the force that strikes your knee, reducing the risk of patellar fracture. You can avoid being pierced by sharp items like nails by wearing a knee pad. Some knee pads are also made to lessen the impact of a hard floor, which can gradually cause major damage to your knees.
Saving money – Over the long haul, knee protectors can help you save a ton of money. The money you’ll spend on knee pads is very little when compared to what you would spend on treatment in the case of a knee injury.
Confidence at work – When you have Snickers knee pads, you don’t have to worry about damaging your knees when you have to kneel on hard ground for extended periods. This helps to enhance your efficiency.
Knee pads are adaptable- kneepads are versatile & you can wear them exclusively at any work and protect the knees. You can also use them in various contact sports, such as football and basketball, which can result in the exertion of heavy pressure on your knees. These knee pads can lessen the impact of hard projectiles during sporting events.
What do you look for while buying a knee pad?
Thickness –Knowing the right padding thickness is important for achieving the ideal balance between comfort and mobility. You may move around freely without sacrificing comfort because of the thickness.
Cushion – Apart from thickness, you need to consider the right material for the knee pads. Choose the best from different types of materials. Use knee pads that have enormous holding capacity against daily wear and tear. It should give the best cushion for long hours.
Adjustment – The knee pads must have adjustable straps, which will make them fit your knee perfectly. The straps guarantee a tight fit to keep you at ease while tiling.
Bottom Line
You shouldn’t look anywhere else while purchasing knee pads than Ceramic Tiling Tools. They provide knee pads of the highest caliber, which are not only durable but give better cushion to protect your knee. For further details Call them right away at 00 44 7801979176.
Ceramic tiling seems one of the most laborious work as far as home improvement projects are concerned. It involves spending countless hours working with your knees on a hard surface. Using the best quality knee pads can be a way to protect your knees while executing any tiling project.
Some tiling works are complex & create a high risk of bodily damage. For example, you usually work on your knees while tiling projects. Doing it for extended periods could bring harm to your knees. Injuries happen due to wear and tear of the knee. In the long run, it could invite primary knee treatment or time corrective surgery. In addition, it could cost you thousands of pounds. Fortunately, you can avoid it all by investing in quality knee pads.
One of the most efficient ways to prevent knee injury is using knee pads. Knee pads are precisely designed to safeguard against impact and cushion your knees. A quality knee pad should stay firmly on your knee. It ensures adequate knee protection. That’s where Ceramic Tiling Tools Knee pads come in handy. It provides a cushion for your knees. It is covered by a rigid outer cap that adds support to your knee. It protects your knee from debris lying around the work site. The large hook-and-loop straps keep the knee pads firmly over the knees. So you can work while standing or kneeling. Let’s examine work knee pads in greater detail and discover their advantages for you.
Protection – The patella at your knee protects your knee joint. But the patella itself is vulnerable to fractures. A decent pair of knee pads can help lessen the impact on your knee. Ultimately it will reduce patellar fracture. Also, wearing knee pads can avoid getting pierced by nails and other sharp things. Additionally, specific knee pads are made to lessen the impact of a hard ground floor. Otherwise, it will bring severe damage to your knees over time.
Money saving – Knee pads can help you save lots of money in the long run. The money you’ll spend on knee pads is very little compared to what you would spend on medical treatment in the case of a knee injury.
Confidence at work – When you have quality knee pads, you don’t have to worry about damaging your knees. You can do the tiling work confidently. You can sit on your knee even on hard ground for extended periods. It also enhances your working efficiency.
Knee pads are versatile – You don’t have to wear knee pads for work only. You can also use them in various activities where you feel heavy pressure on your knees. These pads can also help you minimize the probable damage during the exercises.
Conclusion
Tiling work is one of the most tedious tasks in home improvement projects. The workers spend hours working from one’s knees on a firm surface. It is wise to use knee pads to give cushion to your knees for long-hour shifts. This knee pad has a premium design that guarantees comfort and safety at work. It ensures good cushioning and support while you kneel to handle tiling work for hours.
Authors Bio
This article is written by Ceramic Tiling Tools- is a leading online shop for tiling tools that offer the highest quality products on the trade at the best price.
There are a few advantages that lead to the use of an electric tile cutter rather than a manual cutter.
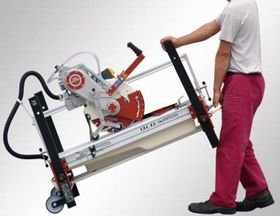
It is generally seen that professional tile installers are using manual cutters. The cutting speed, low investment and ability to work in a clean and comfortable environment are some of the advantages of manual tile cutter drawing professionals to use it. However, the development of formats and the increase in the hardness of tiles lead professional tile installers to use anelectric tile cutter.
There are various types of such cutters made by reputed manufacturers and available at leading distributors in the UK. You can select according to your work nature. However, irrespective of your choice you can expect to have the following advantages by using an electric tile cutter.
Ability to cut varied materials
You can cut a wide range of materials using electric tile cutters. Using a manual tile cutter, you can only expect to cut ceramic tiles; however, electric cutters allow you to cut not only tiles but also natural stones and other materials used in construction.
Versatility of cuts
Another important advantage of using electric cutters is the variety of cuts possible to have. Using a manual cutter, you can expect traditional straight, orthogonal and diagonal cuts. However, if you use anelectric tile cutter, it is possible to have precise mitre cuts. It is also possible to have L or U-shaped cuts in tiles using this nature of cutters. If you require to make vertical cuts or grooves it is wise to use electric cutters.
Quality of finish
It is possible to have a better quality of cuts using electric cutters. The diamond disc and the water-cooling mechanism of this nature of cutters allow having perfect cuts.
So, we can say that it is possible to have quality and varied nature of cuts using an electric tile cutter. However, to have such, it is wise to buy electric cutters made by reputed manufacturers like Raimondi. By buying such a reputed cutter, you can expect to use the electric tile cutters for years to have precise cuts. The cutters from Raimondi are professional, lightweight, accurate and strong. It is also possible to have bi-directional cuts and can cut tiles of different thicknesses without any adjustment. Due to the scratch-resistant breaking foot, it is possible to maintain the delicate glaze of the tiles while cutting.
Types of cutters to choose from
There are basically three types of electric cutters that you can choose from. You can choose between a portable cutter, a moving table cutter and a moving head cutter. Using a portable cutter, it is possible to cut tiles at the site of installation. The speed and ability to cut tiles of varied thicknesses is the advantage of a moving table cutter. You can expect to cut various other construction materials other than tile and have precise cuts using moving head cutters. So, choose accordingly and have the best cut possible.
About the author
Ceramic Tiling Tools is a reputed online shop from where you can purchase an electric tile cutterin the UK. They also make it possible to have the Raimondi brand at an affordable rate. Call them at 00 44 7801979176 to place your order.
The final step in completing a tiling project is grouting. Using the right grout mix and application technique makes your tile work look aesthetically fantastic and last for years. You must ensure that the tile grout joints have been completely cleaned. For a better finish, the tiling experts use a grouting sponge as a tool to wipe off excess grout from joints.
Using expert tools and equipment to thoroughly clean your grout lines prevents dirt and grime build-up. It will lower the chance of future problems. Grout can be cleaned by hand with grout floats and sponges by experienced tilers. A grouting sponge is used to wipe off excess grout from joints. It has round corners to prevent digging out or joints. It comes in either large or extra-large sizes. The grouting sponge is used for scrubbing and removing grout haze. Some of the grouting sponge comes with two sides and some are attached with handles. Some grouting sponge wipes off excess grout from joints while others remove grout haze and stubborn mortar colours. It is excellent for removing grout haze toward the end of the grouting process and it brings a polishing finish to your tile. These sponges are also great for washing other household cleaning tasks.
So, the grouts are inserted firmly into the grout joints. Now you may get worried about the excess grouting or hazy-looking tiles. Don’t be concerned about the mess on the tiles; it will be cleaned up with your sponge when the time comes. Now you want to clean the grouts over your tile to remove the messy things and bring shine. Begin it by filling a clean bucket with water. Soak and wring out your grouting sponge until it’s only slightly damp. Wipe with a clean side of the sponge, then flip it over and wipe another portion before rinsing it clean. Repeat the process besides the first stroke by rotating the sponge to expose a clean corner. After you’ve used all four corners of the sponge, rinse it in clean water, wring it out, and repeat the process until the entire area has been cleaned. Using the same procedure, clean the tiles two or three more times until they’re free of grout residue.
Beginning on one side of the grouted region, position the sponge so that the corner of one long side is in touch with the wall and drag the sponge up the wall in a continuous stroke. The initial sponging removes the majority of the undesirable grout. The second smooth sponging cleans the joints, while the third sponging removes any haze or residue from the tile. Allow a few minutes in between each of the three sponging cycles to allow the grout to be properly set. Remember not to let water from the sponge puddle on the grout because this would weaken and deform it. Finally, the last wipe will remove any leftover haze from the tiles and flatten any remaining high areas in the grout joints. To remove any remaining residue after the grout has dried, polish the tile with cheesecloth or a soft cotton cloth.
Conclusion
When the surface has been cleaned, begin smoothing and levelling, the grout lines with the sponge. Hold the sponge in your palm and rub it over any grout joints that appear to be too high or uneven, gently pressing down with your index finger. The purpose of this how-to grout tile project is to create grout joints that are constant and even in-depth. Allow the sponge to do the work instead of pushing too hard. The best way to ensure your tiles and grouting are left clean and sparkling is to ask a professional tiling expert for help. Visit Ceramic Tiling Tools to browse their full selection of grout cleaning tools from leading brands in the UK & Ireland.
Authors Bio
This article is written by Ceramic Tiling Tools- a leading online shop for tiling tools including grouting sponges that gives a deep clean without scraping, damaging, or staining your tiles.
The secret to a successful tile installation is to ensure that every tile is perfectly straight and equal. Your secret weapon for accomplishing this is a tile leveling system and the know-how to use it.
Do you want to learn how to lay tiles for the first time? Using a tile leveling system is the key to success for both do-it-yourselves and professionals alike! Are you renovating your kitchen, upgrading your shower wall tiles, or putting brand new flooring in your home? You can use a quality tile leveling system in your project to fine-tune tile levels & get a better & smooth finish! It not only saves your valuable time, but it reduces wastage and minimizes labor costs.
Some tile setters have relied on a keen eye, some spacers, and a level for years to create a flat tiled floor on a variety of substrates, regardless of whether the substrate or tile is flat. While some have had success over the years, there has been an increase in tile installation difficulties for a variety of reasons. If the tile doesn’t adhere to the cement or adhesive, then you have to replace it. It will need extra time, effort, and expense. It might be the reason for the entire tile installation project’s downfall. With all of these potential abnormalities, a tile leveling system is the best approach to ensure a perfectly bonded tile and flat surface without lippage. It brings complete solutions to the tile lippage, assures a flat surface, and promotes full adhesive coverage to ensure a stable installation. It will ultimately save your time and money!
A tile leveling system is typically three parts. The technique used in it aims to eliminate tile lippage and improve bonding to prevent future problems. A wedge, clips, and leveling pliers are the most common components of most leveling systems (some systems do not require a tool and can be leveled by using your hand). To achieve an accurate grout joint between tiles, you should use one of the many tiling systems available on the market.
The clip is embedded in the tile adhesive and used on the tile’s edge. The wedge helps to make a smooth transition from one tile to the next while preventing any lips while the glue dries. When laying tile in a big area, the tile leveling pliers apply the proper pressure to the leveling wedge-clip assembly into the glue and decrease hand fatigue. The best way to ensure excellent bonding without lippage is by using a tile leveling system.
Time and money are saved by using a leveling system. Without the use of different sized spacers or shims, the leveling method will give a flat surface on many different types of substrates if utilized appropriately. The clips are also sized to produce a consistent grout joint. The tile leveling system clips are a consumable component that breaks apart when the adhesive has hardened, but the wedges are reusable for future jobs, saving money on materials. When installing wall or floor tiles, there are a few different types of leveling systems to choose from. The size of the tile to be installed and joint size will usually determine what type of tile leveling system you need, see the system in use here. https://youtu.be/5teRqwg_Tr8.
Conclusion
Tile leveling systems have revolutionized elements used by most tiling experts in recent years. Very few experts’ tilers are ignorant of this revolutionary choice. A variety of leveling systems are available on the market. Each of which is designed to produce equally spaced and level tiles. They are designed to ensure a perfect outcome. So there is no need to remove and relay uneven tiles. It is worth investing in a quality wedge, as those which are resistant to wear and tear will last for several projects.
Authors Bio
This article is written by Ceramic Tiling Tools– is a leading online store that supplies the highest quality Tiling Tools in the industry buy your tile leveling system here. https://www.ceramic-tiling-tools.co.uk/collections/raimondi-r-l-s-leveling-system.
Tile installation without applying spacers is extremely challenging & time-consuming. In addition, you need to adjust the tiles constantly to get an even tile joint on the floors or walls. Adding a tile spacer will help you spend less time agonizing over the width and accuracy of your lines.
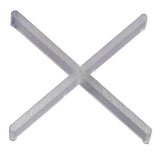
Laying new tiles is a perfectionist’s dream, but it can be an absolute nightmare. Tile spacers can make the job easy, make things look simple & accurate. These little spacers come in different shapes and sizes for different tile installation ‘T’ shaped, ‘+’ shaped, ‘X’ shaped. Using it on the floor, wall, or countertop creates a consistent look to your design. The tile spacer keeps the grout space even.
Are spacers necessary for tiles? Tile spacers may seem insignificant, but minor details matter a lot when it comes to anything as important as tiling. It is essential to maintain a space between the tiles! Tiles remain too close together, bringing the risk of damage when they expand. They could also become dislodged or chipped as well. There are many downsides that you may face if not using the tile spacer during installation. For starters, if the tiles aren’t all the same, they look to be misaligned! Second, Setting out becomes more difficult Third, micro-movement of the tile may lead to breakage. For fast and impeccable floor and wall tile installations, use the tile spacer – a handy tool that lets you install tiles quickly and easily. It guarantees flawless joint lines and space between the tiles.
So, what size should the joint be between the tiles? The common practice in tile installation is 2-3mm wall and floor tiles. However, it is based on the type of tile you are using and the grout line you want to use. But numerous factors can influence the size of the tile spacers you use. Porcelain, granite and marble tiles are generally installed with a 2mm spacer. Brick slips it’s normally a 10mm T spacer. Are you installing a 60mm x 30mm tile? half bond joint then it’s a 2mm T you will need. You just need to choose what size of joint and style you want to maintain a perfect grout line.
Conclusion
Spacers are small plastic inserts placed between tiles to help keep them an even distance apart. Tile spacers are mainly made of plastic. Their size also varies based on your tile and size of joint. CeramicTilingTools sells a wide range of spacers of different sizes and heights for professionals and DIY alike for all tiling installations. Even experienced tile installers like to use tile spacers because of variations between tiles.
Authors Bio
This article is written by CeramicTilingTools– a leading online shop for all types of tile spacers and several other tile installation tools at the best price.